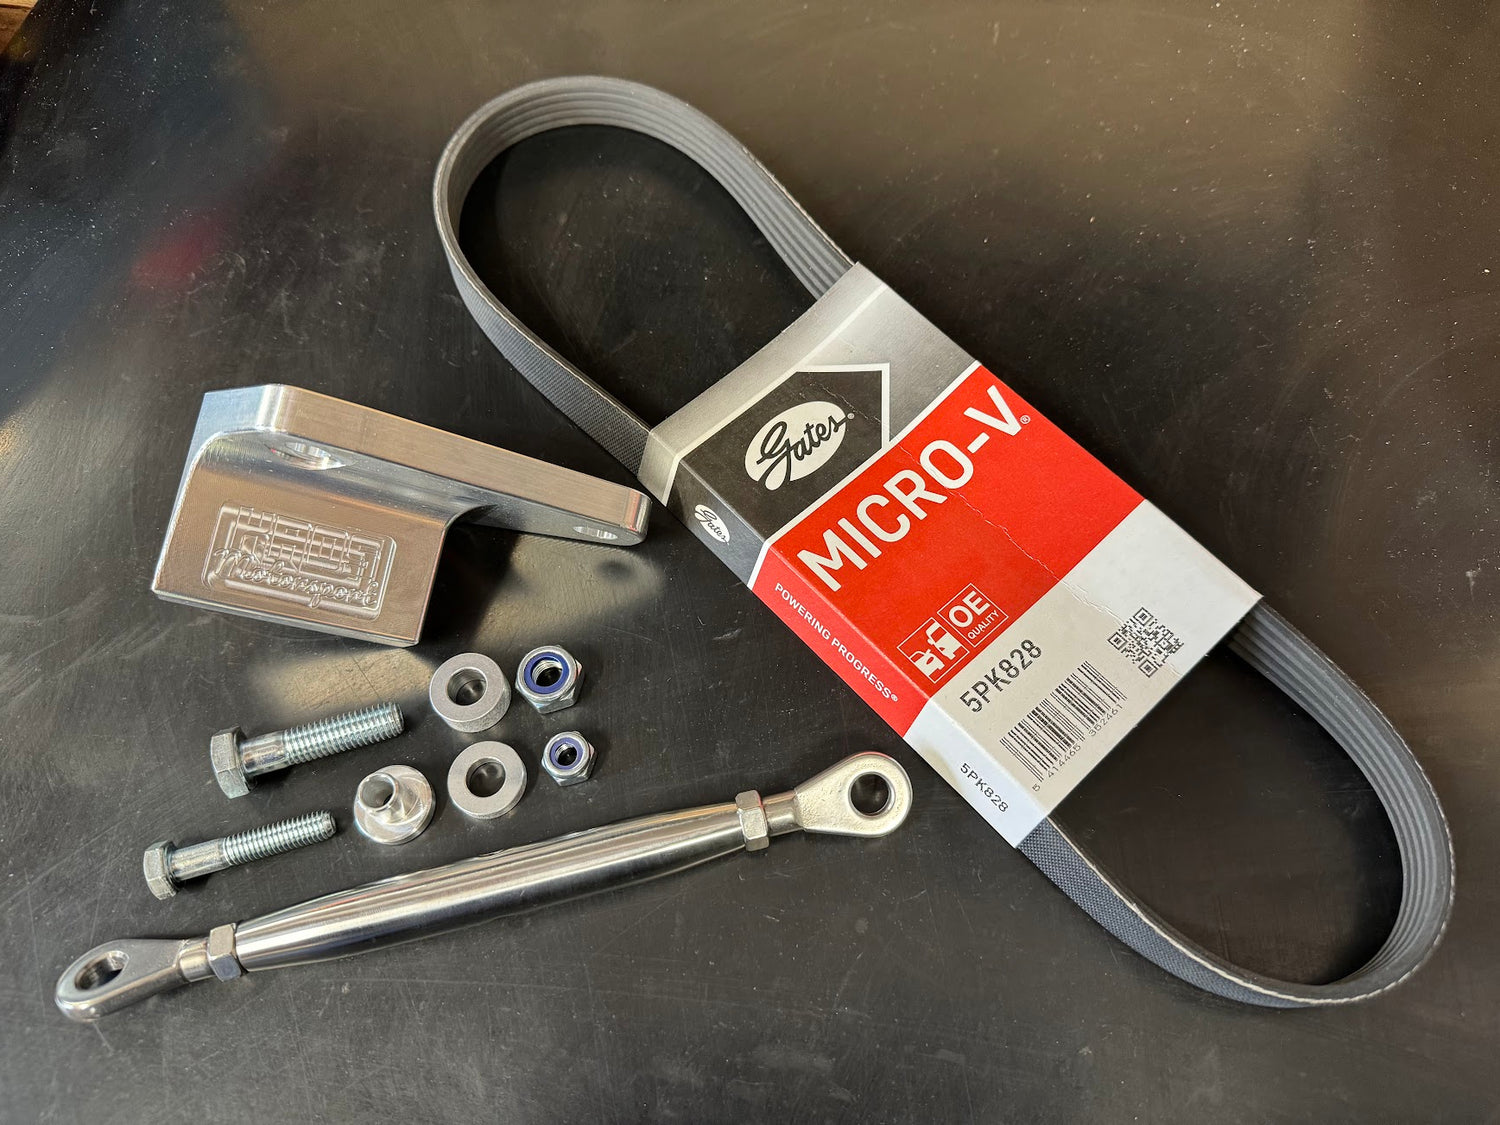
Alternator Bracket Kit
Thank you for your purchase of the KAOS Motorsport alternator bracket kit. We really appreciate your business.
The kit provided contains everything pictured and will be everything you need to replace the stock alternator bracket when both the AC and power steering has already been removed from your vehicle.
Kit Contents:
- KAOS Motorsport Alternator Bracket
- Gates 5 rib auxiliary belt
- Stainless steel tensioner
- M8 stainless nut and bolt
- M10 stainless nut and bolt
- Reducer spacer
- 5mm & 10mm spacers
These instructions are provided to assist in the installation of this kit, no guarantees are given that this kit will fit your vehicle if other modifications have been made or if any modifications have been made to the items provided.
If you are unsure of anything, please feel free to contact us for assistance.
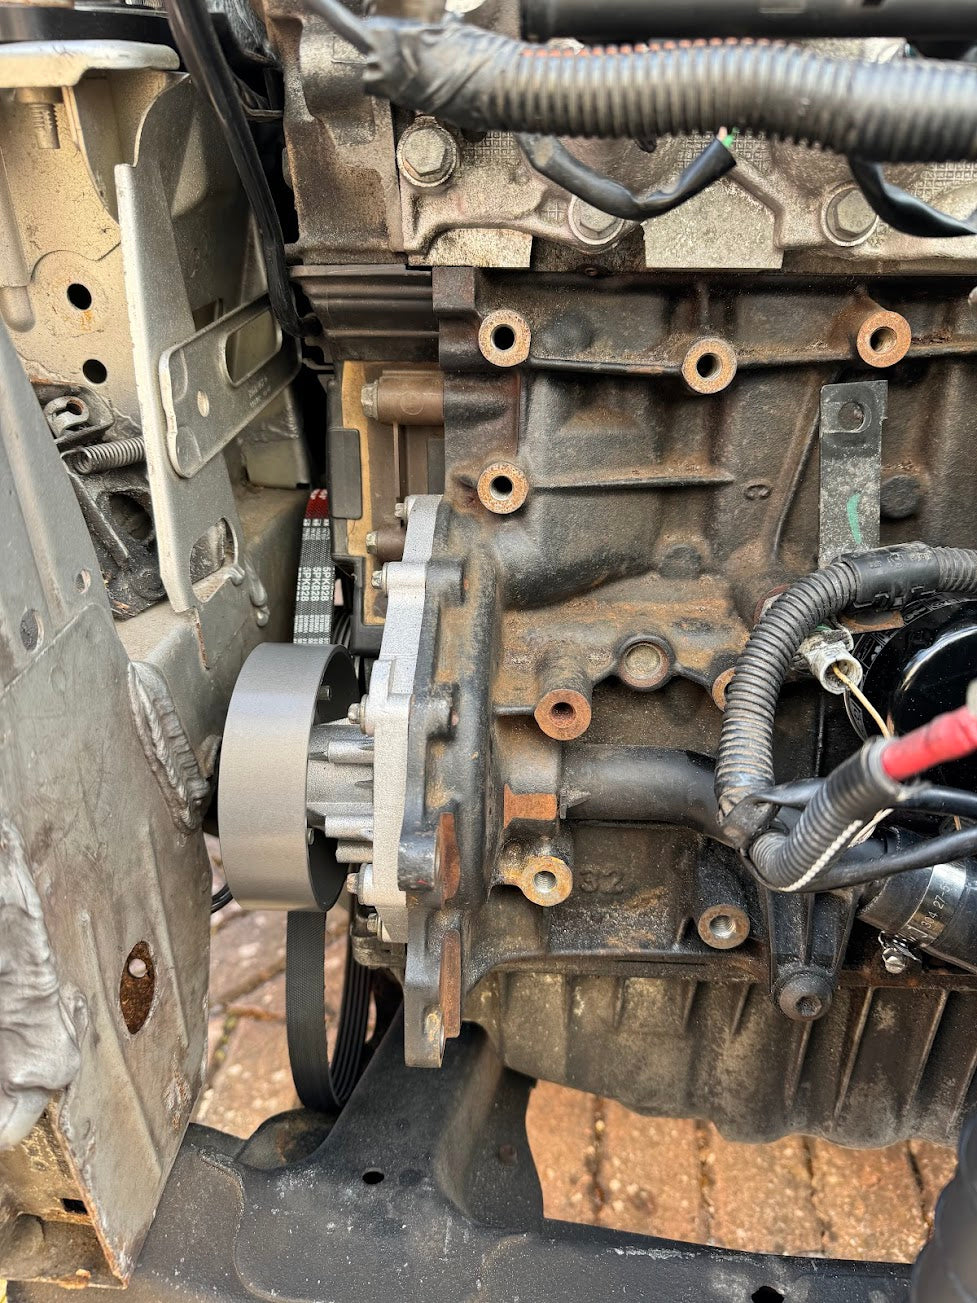
Mounting Location
The new alternator bracket mounts to the 3 holes used previously by the power steering pump. These are situated just under the head and above the water pump.
Please ensure there are no existing brackets still on the engine. This includes the power steering pump bracket and the original alternator bracket.
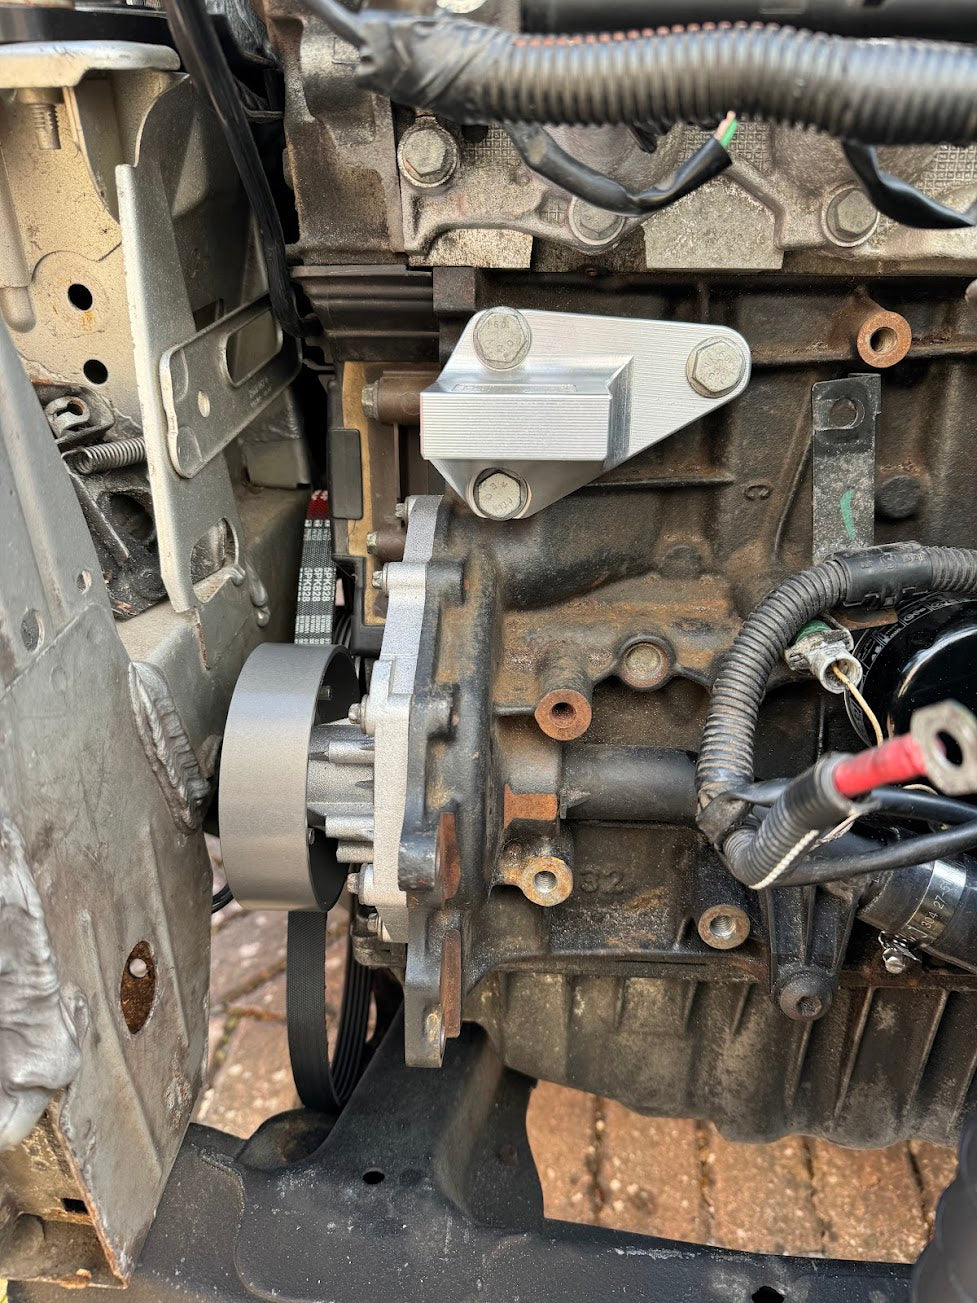
Bracket Mounting
Attach the KAOS Motorsport bracket with the logo facing upwards onto the engine.
Use the bolts from the original power steering pump bracket for mounting the new alternator bracket.
(These bolts are M10x??? if you require replacements just let us know and we can provide them)
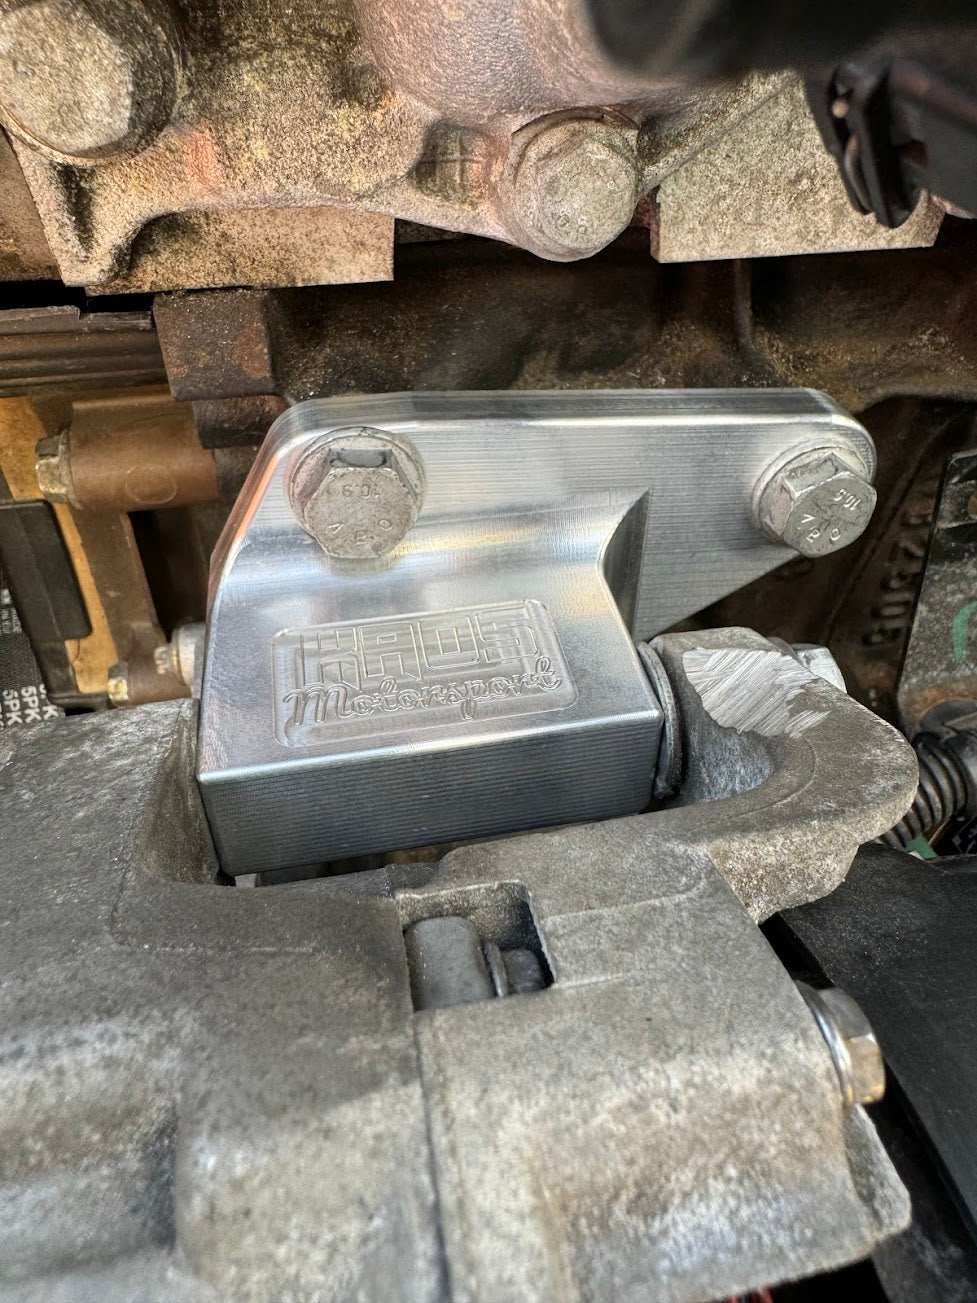
Alternator Mounting
Mount the alternator onto the new KAOS Motorsport bracket and use the existing alternator bolt to secure it in place.
Make sure not to tighten this bolt yet as it needs to be loose to ensure the alternator can move freely while it's tensioned.
Fitting the auxiliary belt
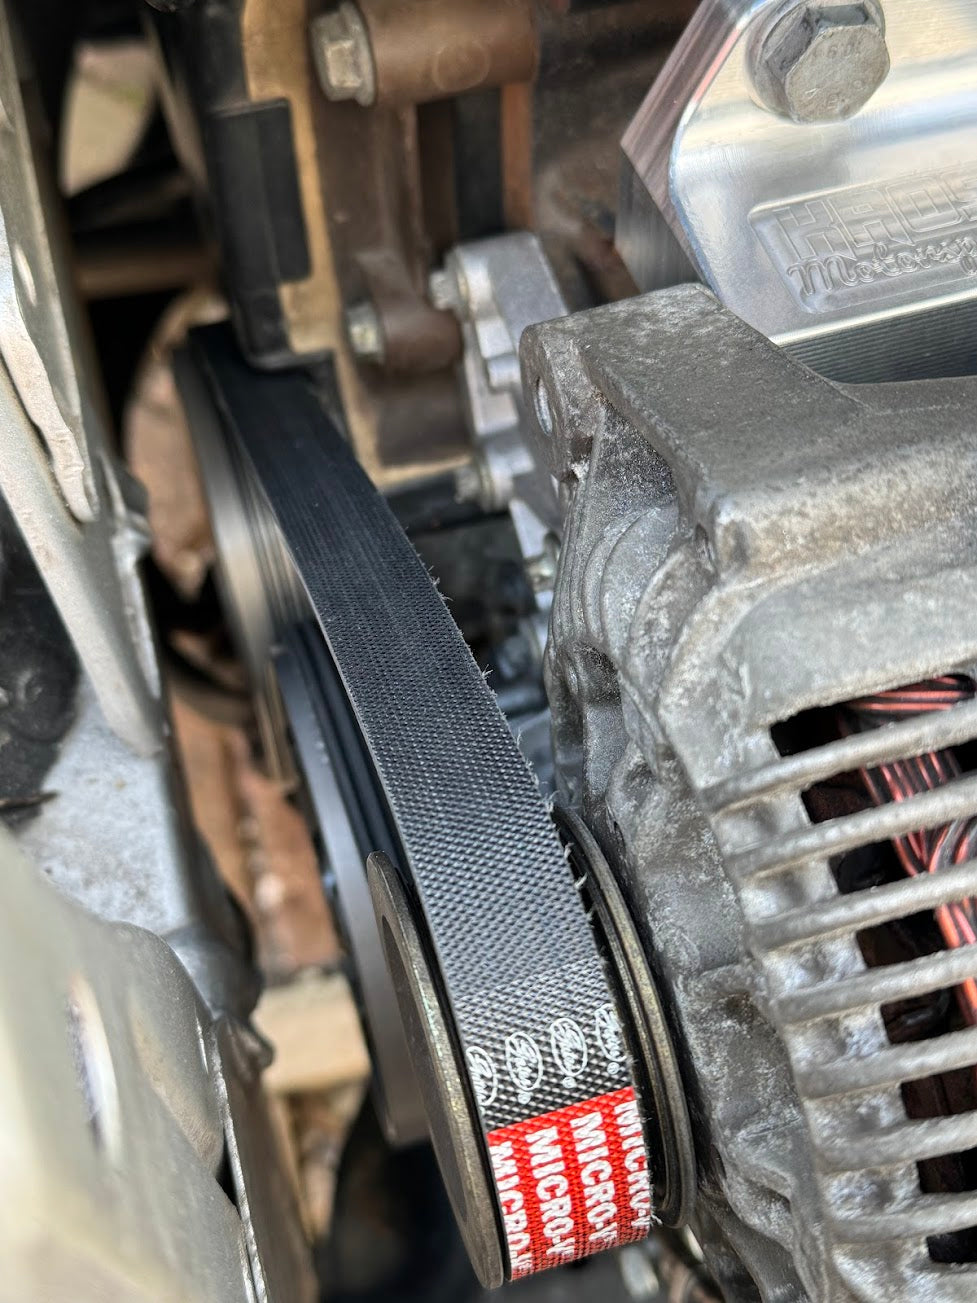
Care must be taken when fitting the provided auxiliary belt as it is narrower than the original belt used by Renault.
It must be fitted to the outer ribs on both the alternator and crank pulleys - this is the left most ribs leaving a gap on the right-hand side of both pulleys.
Feed the belt onto the crank pulley first, wrapping the belt up over the water pump and then forward and around the alternator pulley.
The belt should have a small amount of resistance when slipping over the alternator pulley as there is a lip it must be pulled over. Once it is over the lip, you should find the belt has a small amount of slack ready to be tensioned.
Fitting the tensioner
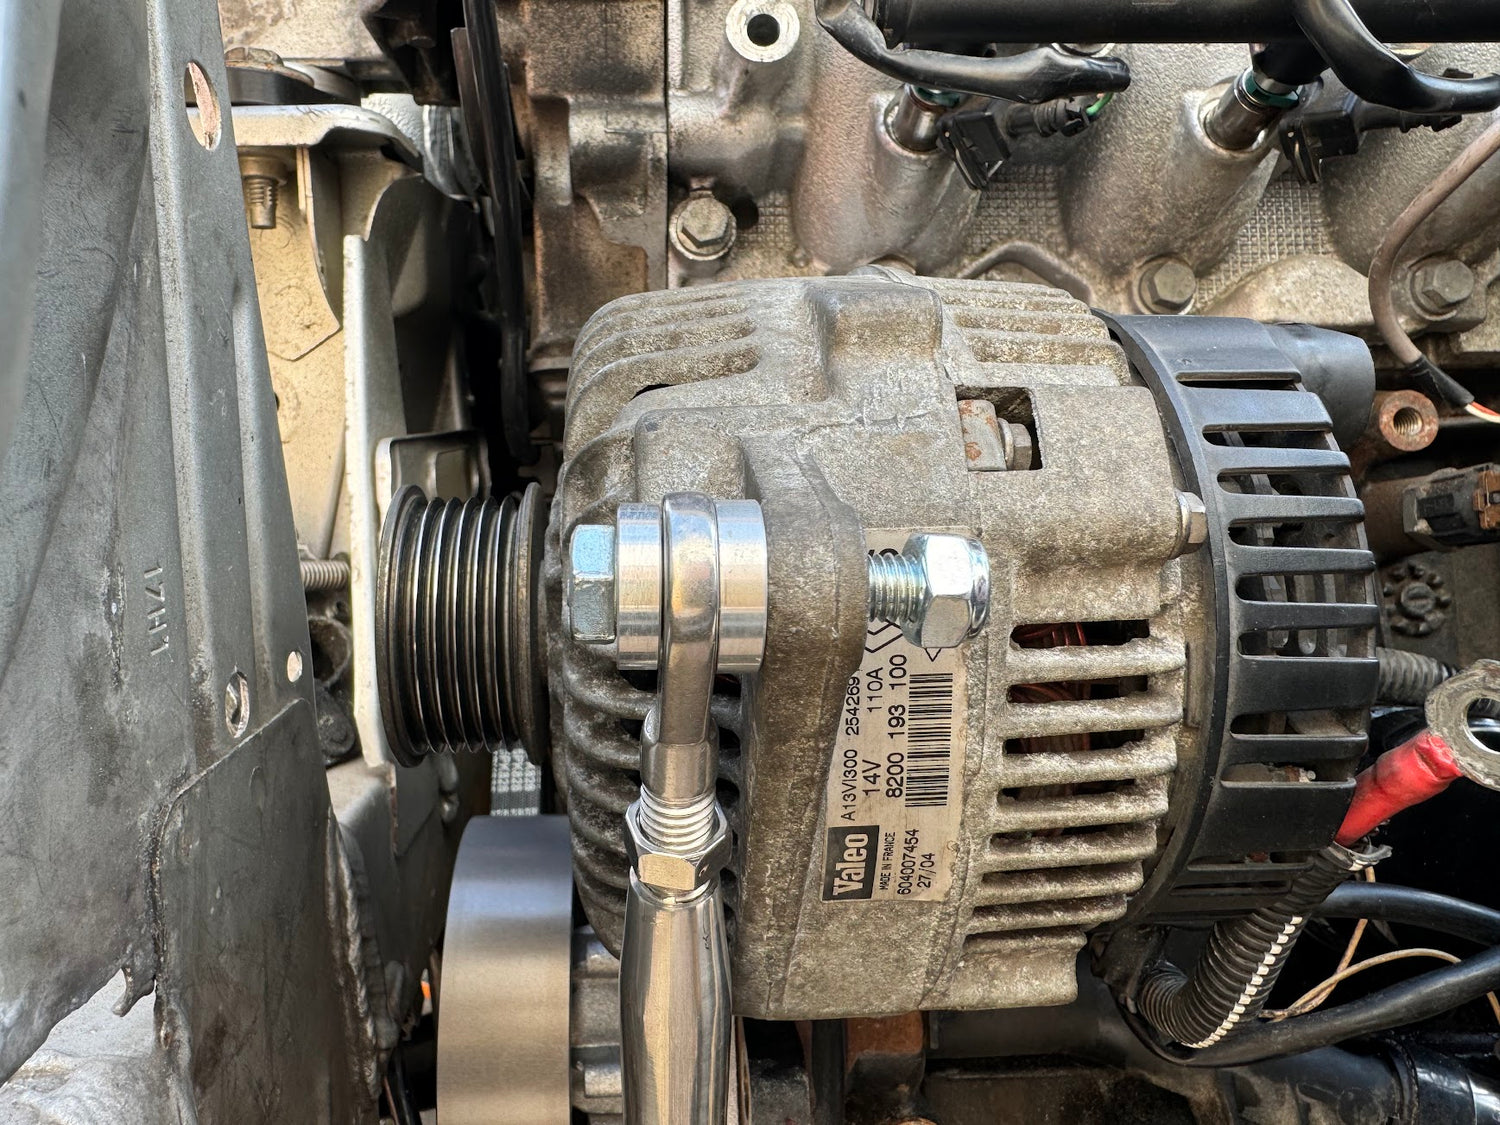
The tensioner requires a small amount of assembly to ensure it is setup correctly for both mounting points.
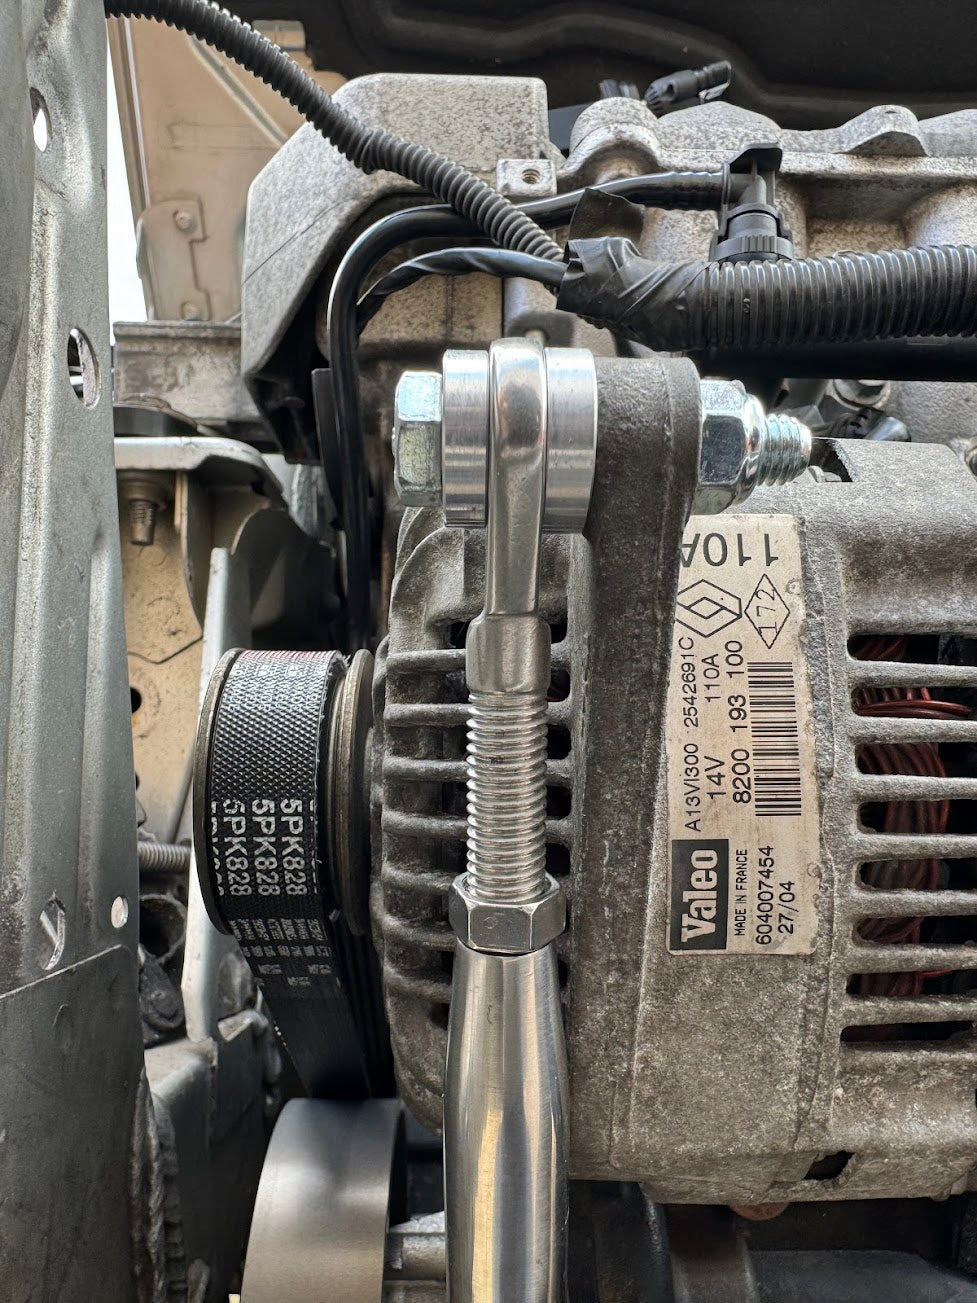
Attach the provided M8 bolt with the provided M8 reducer onto one end of the tensioner. Once in place on the tensioner, add an addition 5mm spacer onto the other side of the tensioner eye. Pass the bolt through the top of the alternator and finish by adding the nyloc nut provded.
The order should be:
Bolt, reducer, tensioner eye, 5mm spacer, alternator, nut
Please refer to the photo to confirm.
Leave the nut loose for now, this will be tightened after tension is added to the belt.
Fitting the tensioner cont.
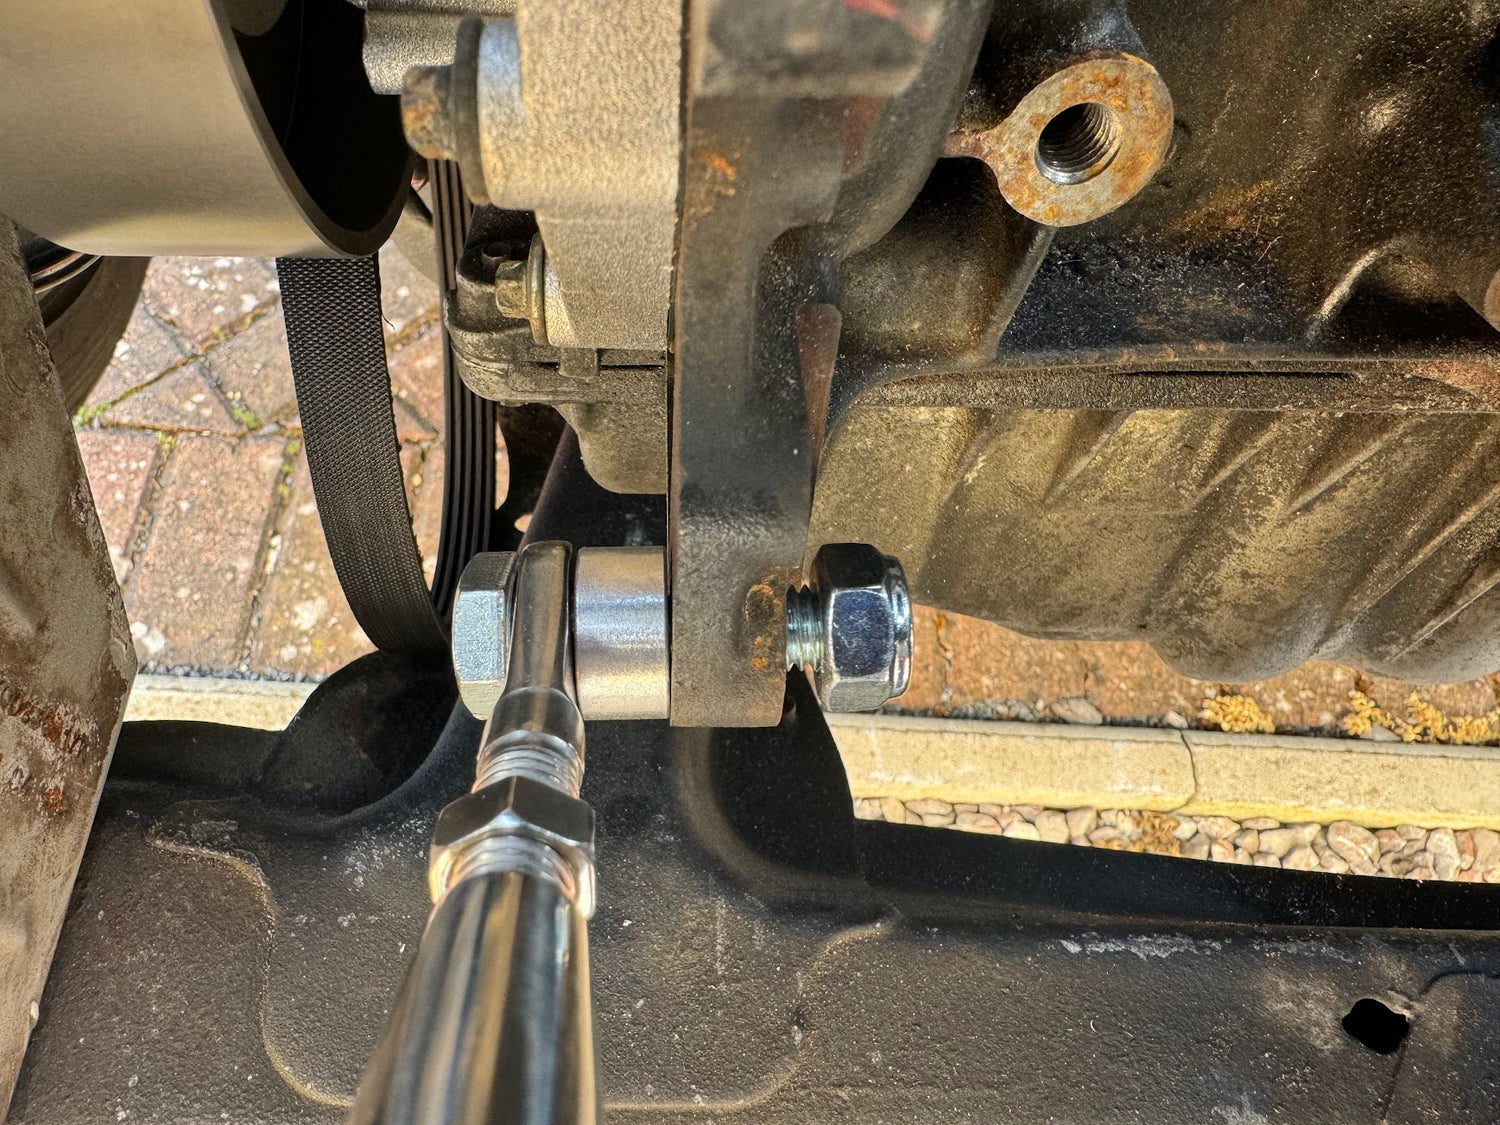
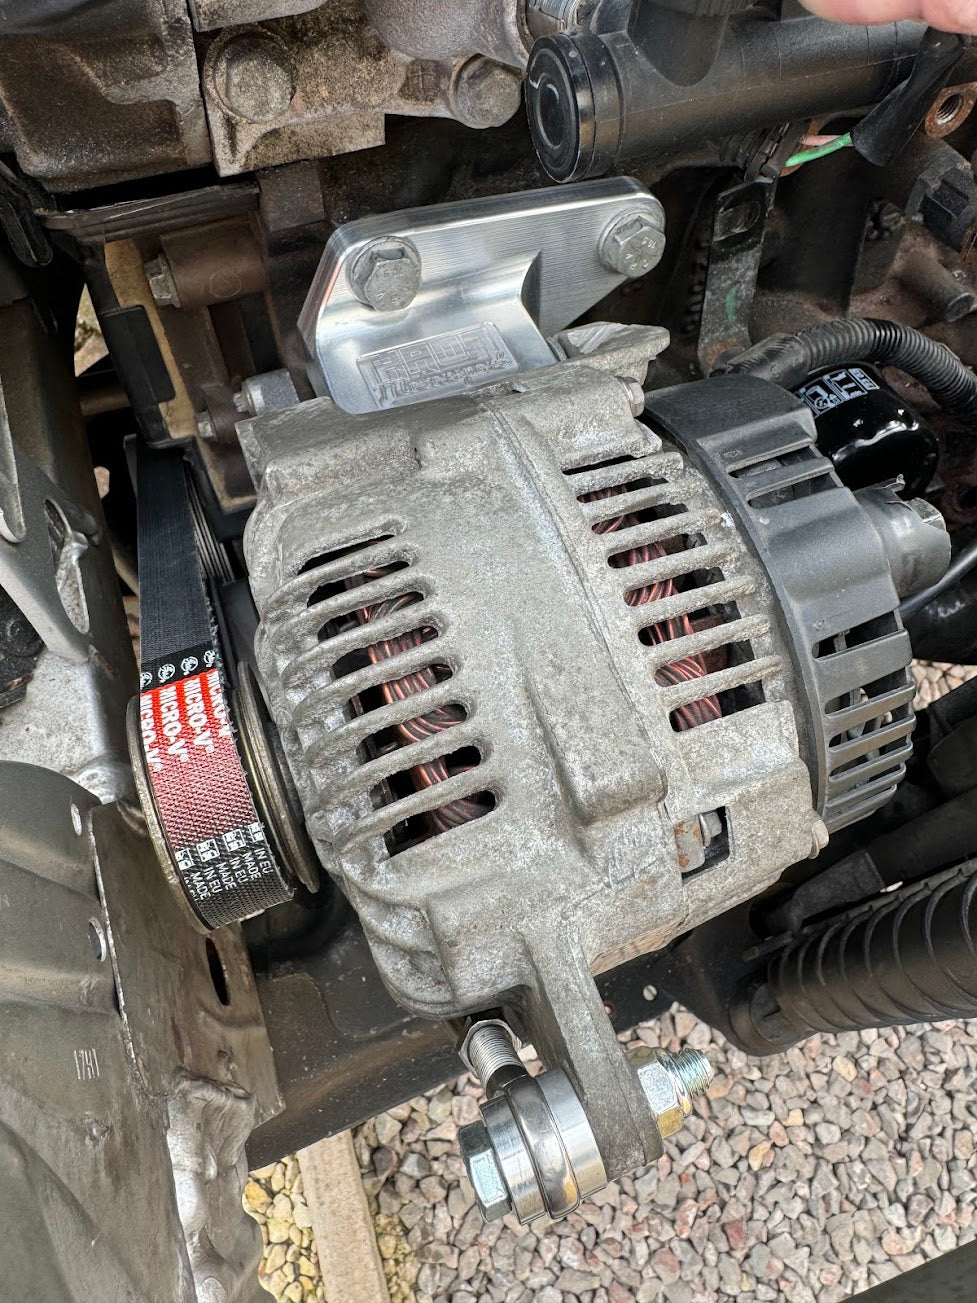
Attach the provided M10 bolt through the other end of the tensioner eye and place the 10mm spacer onto the bolt. Pass the bolt through the bottom mounting hole and secure it with the M10 nyloc nut provided.
The mounting hole for this end of the tensioner utilizes the lowest bolt below the water pump that was previously used for the old alternator mounting bracket.
The order should be:
Bolt, tensioner eye, 10mm spacer, alternator, nut
Please refer to the photo to confirm.
Leave the nut loose for now, this will be tightened after tension is added to the belt.
Tensioner final position
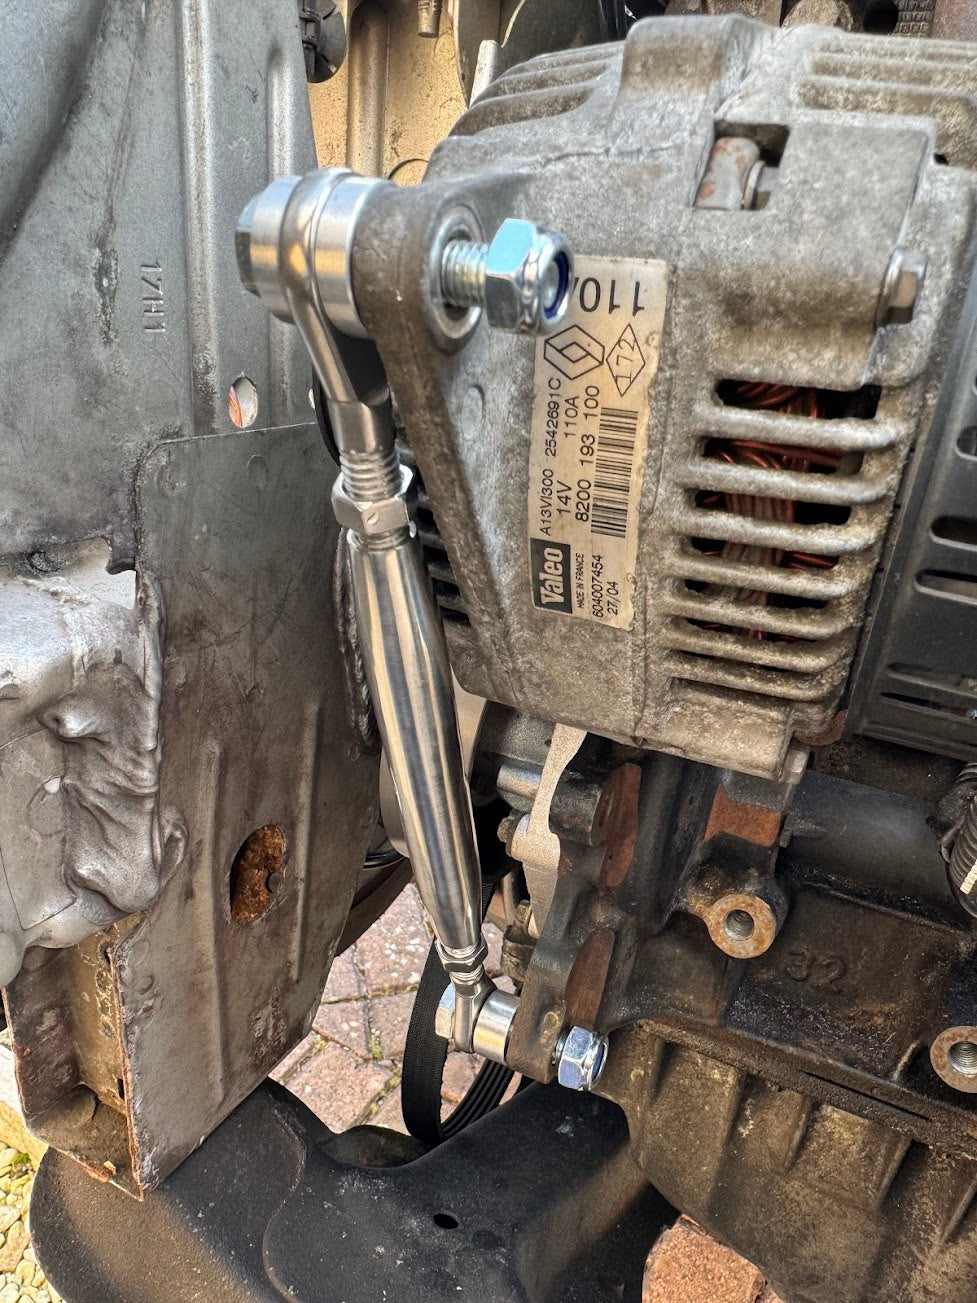
Refer to the photo that your tensioner is in the correct location with the correct nuts, bolts and spacers used.
The tensioner should be relatively loose in all aspects at this stage and should not be tight anywhere.
Adding tension
Tension is added to the belt by rotating the centre of the tensioner initially by hand.
Turn the tensioner either clockwise or anti-clockwise to increase or decrease the height of the alternator and thus increasing tension on the belt.
Due to the tensioner being reversible, the direction of rotation will depend on the orientation you fitted but it should be obvious which direction moves the alternator upwards and subsequently exposes more threads on the tensioner ends.
Once increasing tension has been added and you can no longer turn it by hand, it will be necessary to use a tool to turn the centre of the tensioner. Suggested is a 4mm allen key through the hole provided to give you enough leverage.
During the tensioning process, please ensure the auxiliary belt is seated correctly into the grooves on both the crank pulley and alternator pulley.
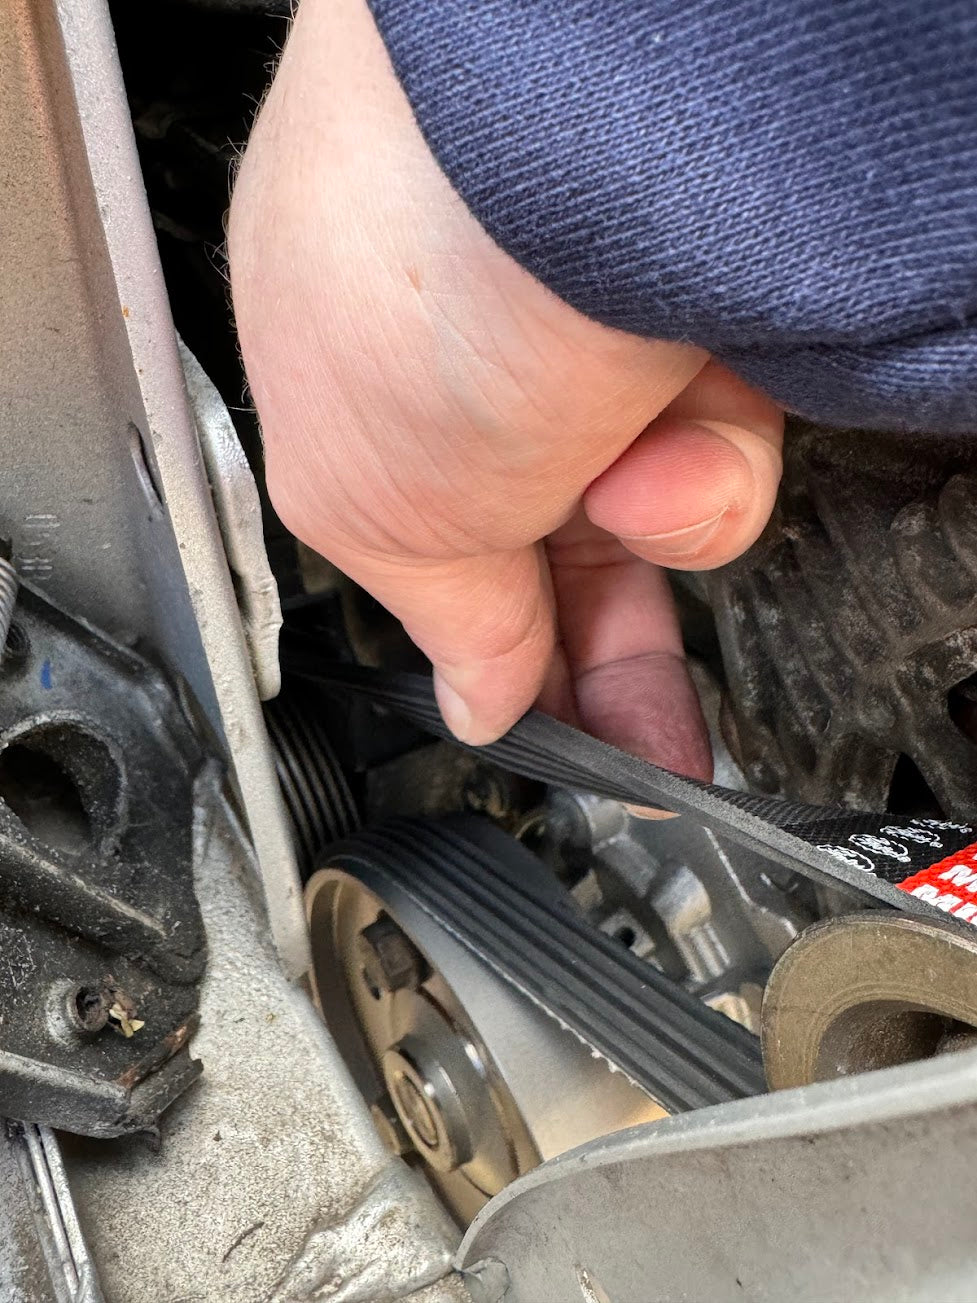
Correct tension is achieved when the auxiliary belt can be twisted around 90 degrees on the longest section.
Tighten all nuts and bolts
Now that the correct tension has been added to the belt you can continue to tighten all fasteners that have been added.
Please refer to the information below for all sizing:
- Top alternator bolt through bracket, 16mm
- Top alternator nut and bolt for tensioner, 13mm
- Bottom alternator nut and bolt for tensioner, 17mm
- Jam nuts on tensioner, 13mm
Please ensure the jam nuts are tight against the centre section of the tensioner. Access can be tricky but a 13mm open ended spanner will fit.
We also recommend using loctite on the tensioner jam nuts to ensure they do not come loose under engine vibration.
Installation complete
Refit the alternator power and secure with the 13mm nut, refit the sensor wire.
Ensure nothing has been left in the way and start the car. The alternator pulley should be clearly spinning.
If you experience any noises, tapping or chirping, you have not added sufficient tension to the auxiliary belt.
To re-tension the belt, ensure you loosen all the nuts and bolts including that of the alternator so it can be freely tensioned again and tighten everything again as per the previous step.
